Keywords: penetrate blocking, virtual line, player, fov, ray, target, map, area, rim, circle, visible, radius, simple. Powered by TextRank.
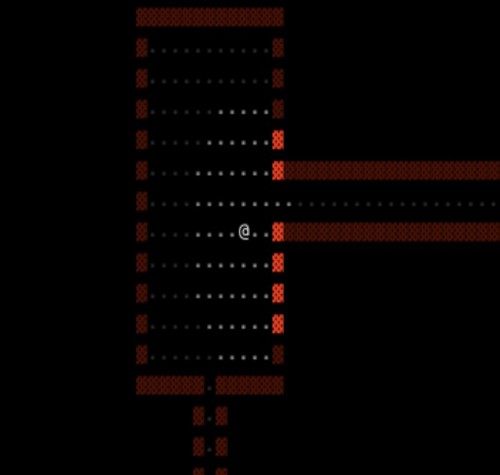
FOV is the area that is visible to the player. Making the whole level visible would lead to boring games so the area is limited to a certain radius. There are a couple of different algorithms that can be used to implement FoV. I choose to go with the simplest which is ray casting from the player position towards the outer rim of a circle that is defined by the how far the player can see.

The algorithm is pretty straight forward. Calculate the rim of the circle defined by the radius R that corresponds to the maximum distance the player can see. Don't forget to clamp the coordinates returned by this function to the limits of the map. You can get negative coordinates (or more generally out of bounds coordinates) if the player is standing at the top left edge of the map. The ide
private static func rim(origin: XY, radius: Int) -> [XY]{
    var result = [XY]()
    var x = radius, y = 0
    var P = 1 - radius
    result.append(XY(x: origin.x, y: origin.y + radius))
    result.append(XY(x: origin.x, y: origin.y - radius))
    result.append(XY(x: origin.x + radius, y: origin.y))
    result.append(XY(x: origin.x - radius, y: origin.y))
    while x > y {
        y += 1
        if P <= 0 {
            P = P + 2 * y + 1
        } else {
            x -= 1
            P = P + 2*y - 2*x + 1
        }
        if x < y {
            break
        }
        result.append(XY(x: origin.x + x, y: origin.y + y))
        result.append(XY(x: origin.x - x, y: origin.y + y))
        result.append(XY(x: origin.x + x, y: origin.y - y))
        result.append(XY(x: origin.x - x, y: origin.y - y))

        if x != y {
            result.append(XY(x: origin.x + y, y: origin.y + x))
            result.append(XY(x: origin.x - y, y: origin.y + x))
            result.append(XY(x: origin.x + y, y: origin.y - x))
            result.append(XY(x: origin.x - y, y: origin.y - x))
        }
    }
    return result
}
Now we have a bunch of target coordinates that we can shoot rays at. When shooting the rays the only thing that you need to check for is to make sure you don't penetrate blocking tiles like walls. This is a simple check when we are drawing a virtual line from the origin to the target. We stop drawing if we hit a wall. Drawing a line uses Bresenham's rasterized line drawing method.
public static func bresenham(x0: Int, y0: Int, x1: Int, y1: Int) -> [XY] {
    var result = [XY]()
    var dx = x1 - x0
    var dy = y1 - y0
    let xsign = dx > 0 ? 1 : -1
    let ysign = dy > 0 ? 1 : -1
    dx = abs(dx)
    dy = abs(dy)

    var xx: Int, xy: Int, yx: Int, yy: Int
    if dx > dy {
        xx = xsign
        xy = 0
        yx = 0
        yy = ysign
    } else {
        let t = dx
        dx = dy
        dy = t
        xx = 0
        xy = ysign
        yx = xsign
        yy = 0
    }
    var D = 2*dy - dx
    var y = 0
    for x in 0...dx {
        result.append(XY(x: x0 + x * xx + y*yx, y: y0 + x*xy + y*yy))
        if D >= 0 {
            y += 1
            D -= 2 * dx
        }
        D += 2*dy
    }
    return result
}
Now that we have a way of casting the rays, we just need a loop that sends a ray to each of the targets.
static func naiveFov(origin: XY, radius: Int, level: [[Tile]]) -> [XY] {
    let rows = level.count
    let cols = level[0].count
    let rim = Set(Self.rim(origin: origin, radius: radius)
      .map { XY(x: clamp($0.x, min: 0, max: cols), y: clamp($0.y, min: 0, max: rows)) })
    var lit = [XY]()
    for target in rim {
        let ray = Bresenham.bresenham(x0: origin.x, y0: origin.y, x1: target.x, y1: target.y)

        for path in ray {
            if level[path.y][path.x].blocking {
                lit.append(path)
                break
            }
            lit.append(path)
        }
    }
    return lit
}
This is a rather inefficient way in terms of complexity as it processes the same tiles over and over but in practice is fast enough. There are other more sophisticated ways of determining FoV with different permissiveness properties like shadow casting which I will explore in the future.
The code here only calculates the coordinates that fall in the FoV but doesn't do any highlighting. Thats part of a different post.
728 words
Powered by TF-IDF/Cosine similarity
First published on 2020-07-18
Generated on 11 Aug 2025 at 12:23 PM
Mobile optimized version. Desktop version.